How to Secure Your Orbi Login and Prevent Unauthorized Access
Orbi has become a common networking device that is found in almost all homes. All thanks to its various features like ease of use, wider coverage, scalability and mesh technology. It is a go-to choice for everyone who needs seamless wifi connectivity in every single corner of their abode. But just like any other networking gadget, Orbi is also prone to security threats. Users generally overlook the security and this is the reason why they end up losing their private data and sensitive information to the hackers or third parties. Therefore securing your Orbi login and to prevent unauthorized access, you need to take up some crucial and basic security measures. To help you with the same, we have curated this guide.
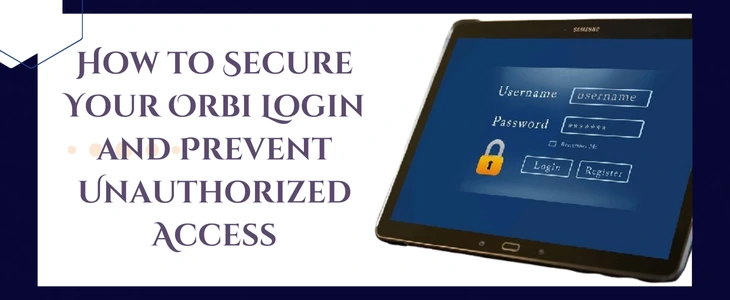
✓ Change The Default Username And Password
First and the most important thing that users generally don’t pay attention to is default admin details. After setting up the network, it’s extremely crucial to modify the default login information, especially the password. Because keeping it as it is means keeping the security door unlocked for unauthorized access. To modify these details, check out these simple steps:
- First take up a device that has its connection to the Orbi network.
- Thereafter, open up an internet browser.
- Head towards the address field. Enter orbilogin.com. Push enter key.
- Now provide the default details. Ensure its correctness. In the username blank fill up admin. The term password goes up in the next blank.
- As you tap on login, the main panel opens up.
- From here select Advanced. Then move to the administration option. There you’ll get the option to alter the security key. Do so and ensure the password you put us is not something basic like 12345 or your DOB. Rather it should be hard and difficult to guess.
✓ Enable WPA3 Encryption For Better Security
Wi-Fi security is yet another important aspect for securing your Orbi network and for preventing unknown access. If you are still using WPA2 security encryption or in the worst case scenario no encryption at all, then you yourself are asking the intruder to take away your privacy. WPA3 security encryption is the latest as well as the strongest. So make sure you enable it immediately. You can put up the encryption on one frequency band or both. But it’s an expert recommendation to put it up on both the bands. To do so first login into your Orbi, using www.routerlogin.net. Thereafter input the right login information. From the home page select wireless option. From the security option choose WPA-3 Personal option. Now put up a password for your network, also repeat the same for the 5Ghz band. And that’s how you enable WPA3 security encryption.
✓ Set Up A Guest Network
Do you have regular visitors or guests entering your premises? If yes, then setting up a guest network for them is a wise and practical decision. Basically this network is distinctive from your main network. So whenever someone asks for the details for connecting to the Orbi, then instead of providing them the password for your main network, you can spell out the password of the guest network. This way the third person won’t be able to breach the privacy of your private network.
To set up a guest network, you need to login into your Orbi. Thereafter from the home page select the Guest Network option. Thereafter tick up the Enable Guest Network option as well as the enable SSID Broadcast option. Now put up the guest network SSID, password and enable security encryption. Lastly tap on Apply. You have now successfully created a seperate network for your visitors.
✓ Enable Two Factor Authentication
Two-factor authentication is an additional layer of security that can help protect your Orbi login. Curating a strong password offers a basic level of security, but when someone tries to enter your system unethically, then two factor authentication immediately sends a code to your phone. This immediately gives you indication about the unauthorised access. Therefore leverage on two factor authentication. The accurate instructions for the same are written below:
- First open up your Nighthawk or Orbi application on your smart device.
- Thereafter move to the top corner of the main dashboard. Here you’ll find the cloud or home icon. Tap on it.
- Now select account management. Then pick up login settings. Now tap on the Two step Authentication option.
- Tap on Enable. Select push notifications and hit Continue.
- Finally, put up your phone number. Hit Continue. You’ll receive a code, give it in and again hit Continue option.
- Lastly tap on Approve. Your 2FA is now active.
✓ Keep Firmware Updated
Orbi manufacturers keep releasing updates on a regular basis. These updates add up features, rectify other bugs and most importantly address security flaws. Therefore, keeping the Orbi up-to-date is non-negotiable. It not only amps up the overall network performance but also protects it from the unethical third party entries. Steps for updating Orbi’s firmware are as follows:
- After you successfully gain access to the main panel of your Orbi application, move towards the top-left corner. Here you’ll find the option of Menu. Tap on it.
- Select settings. Then select the Router settings option.
- Now scroll down and pick up the Check for updates option.
- If the updates are available then you’ll get an option for installing them. Tap on it too.
- Lastly, start following the prompts as the app displays one by one.
✓ Disable Remote Management
Remote management is a helpful feature as it allows you to access your Orbi network from any remote place. But at the same time it also poses a risk to the network safety. Therefore until it is necessary, try disabling the remote management. Hackers can easily exploit the vulnerabilities that come with remote management.
Additionally, it’s important to keep a check on connected devices. Use the Orbi application for the same. If you find a suspicious device in your network, then immediately take action by removing its access.
For any other query, assistance or issue feel free to connect to the experts.